
A few months back, I experimented with using AI to generate Revit models from sketches. Corridors were my bugaboo.
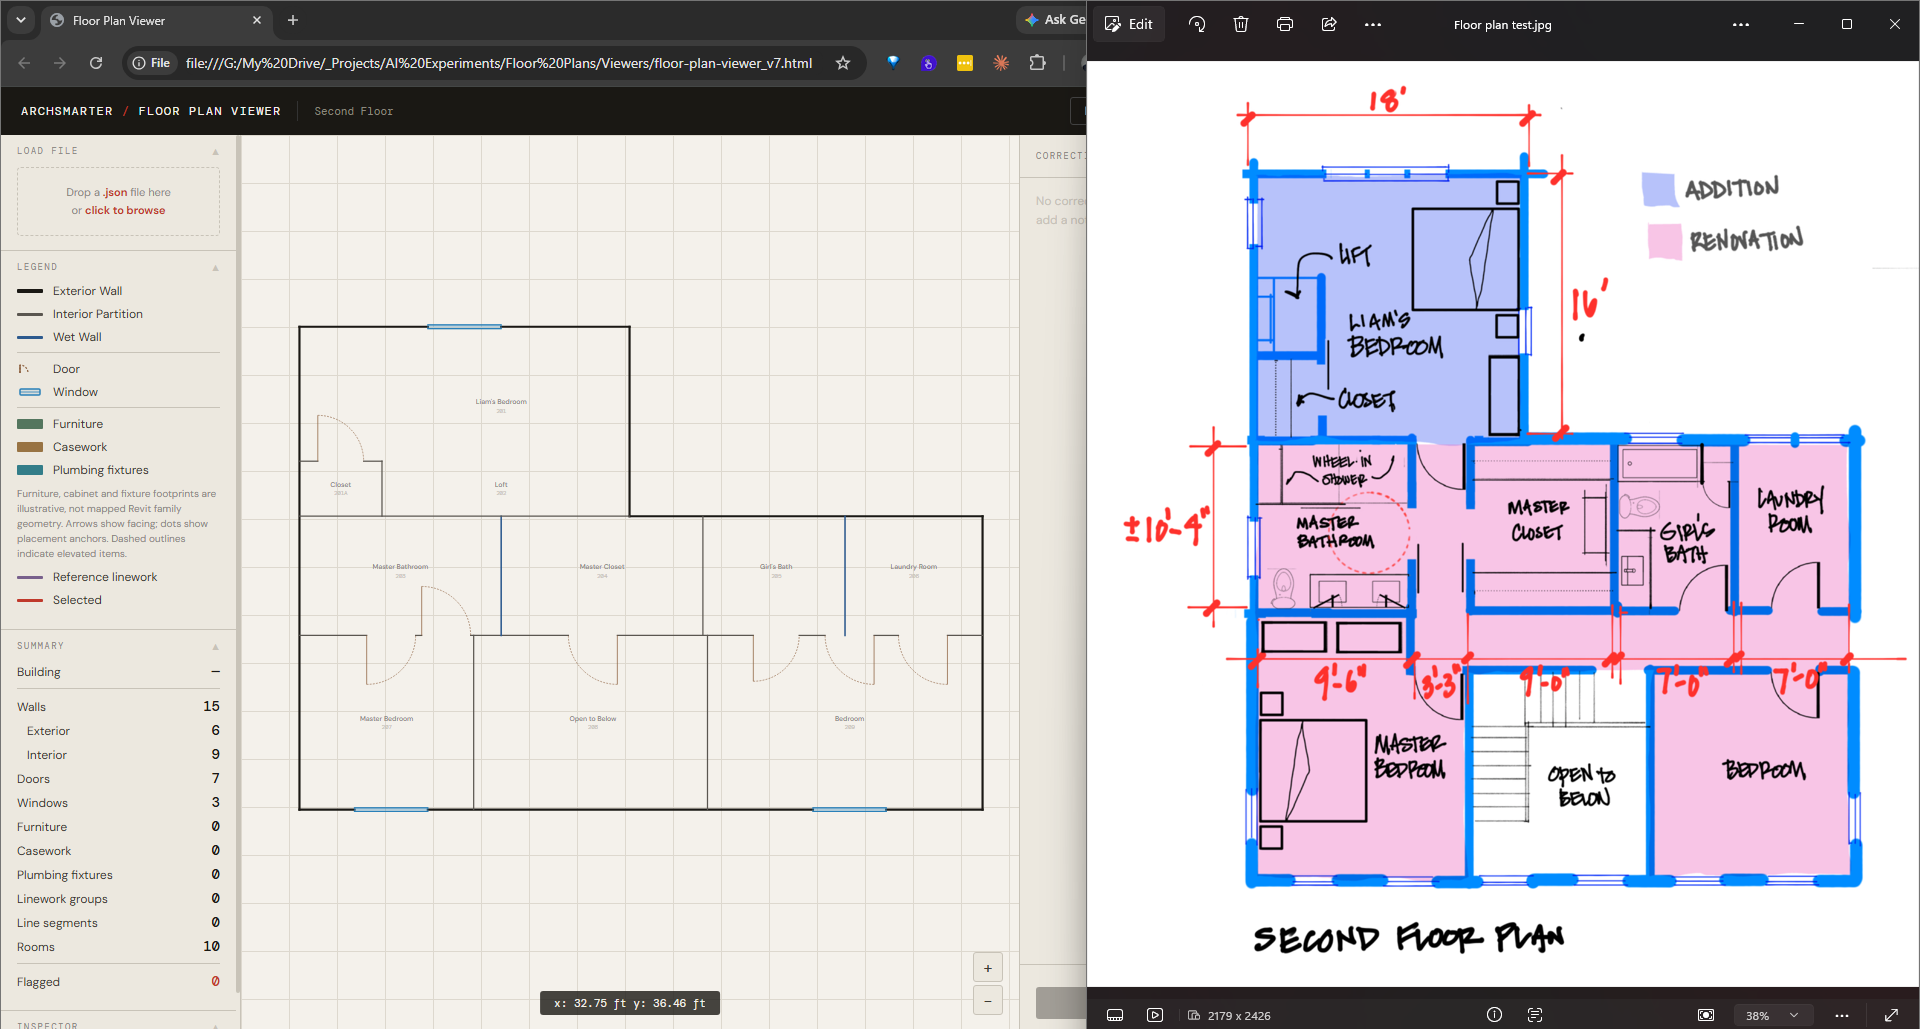
I’d already had good results using Claude to generate Revit families from images. A floor plan seemed like a reasonable next experiment. Give AI a sketch, have it identify the elements, then use that information to build the model.
The results were inconsistent. Claude struggled with the layout, particularly the corridors, and I eventually put the experiment aside. You can read about those early attempts in this blog post: Can AI Convert a Floor Plan Sketch to a Revit Model?.
I recently revisited the process using ChatGPT with GPT-6 Astra. This time, it interpreted the sketches MUCH better. I also tested a larger dormitory plan rather than stopping at a residential sketch.
The result still needs checking and cleanup. But I’m getting a starting model that’s worth working with.
Inspect before modeling
The process separates interpreting the drawing from creating the Revit elements.
First, ChatGPT reads the image and generates a structured data file. Then I review that file in a floor plan viewer. Once I’m satisfied with the interpretation, a script reads the data and creates the elements in Revit.
That middle step lets me see what the AI thinks the drawing contains before I bring it into my model. I can catch a misplaced opening or an extra door without reading through coordinates in a text file.
In the video below, I walk through the workflow using a residential sketch and an older dormitory floor plan.
Here’s how the process works:
1. Turn the image into structured data
I start by uploading the floor plan image to ChatGPT along with a custom Revit Floor Plan skill.
The skill describes how to organize the interpreted drawing into a JSON file. If you haven’t worked with JSON, it’s a text-based data format. In this case, it stores information about walls, doors, windows, rooms, and their locations.
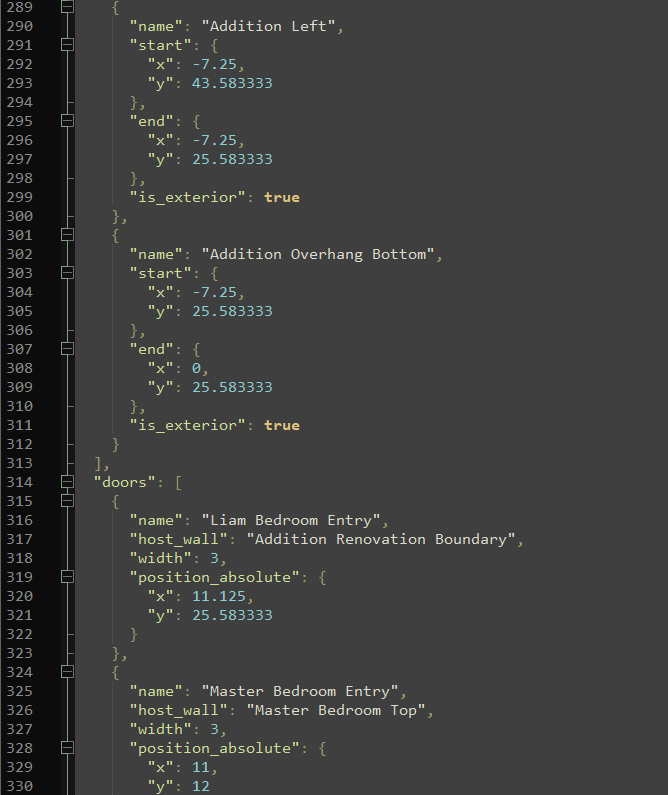
Before generating the residential plan, ChatGPT asked whether the dimensions referred to wall centerlines or outside faces. It also asked whether it could estimate unmarked dimensions and whether to include furniture and casework.
I chose wall centerlines, allowed estimates, and asked it to include the additional elements. It took about three minutes to generate the initial file.
Those answers affect what comes out the other end. If you’re expecting outside-face dimensions and the data uses centerlines, the walls won’t land where you expect.
Allowing estimates also means you need to distinguish what came from the drawing from what AI inferred. A guessed dimension doesn’t become reliable because it now has a dimension string in Revit.
2. Check the interpretation before it reaches Revit
To review the file, I use a floor plan viewer I built with Claude.
The viewer draws the plan from the JSON data so I can compare it with the original image. It also lets me select an element, describe a correction, and save a note. I can then copy those notes into ChatGPT and ask it to revise the file.
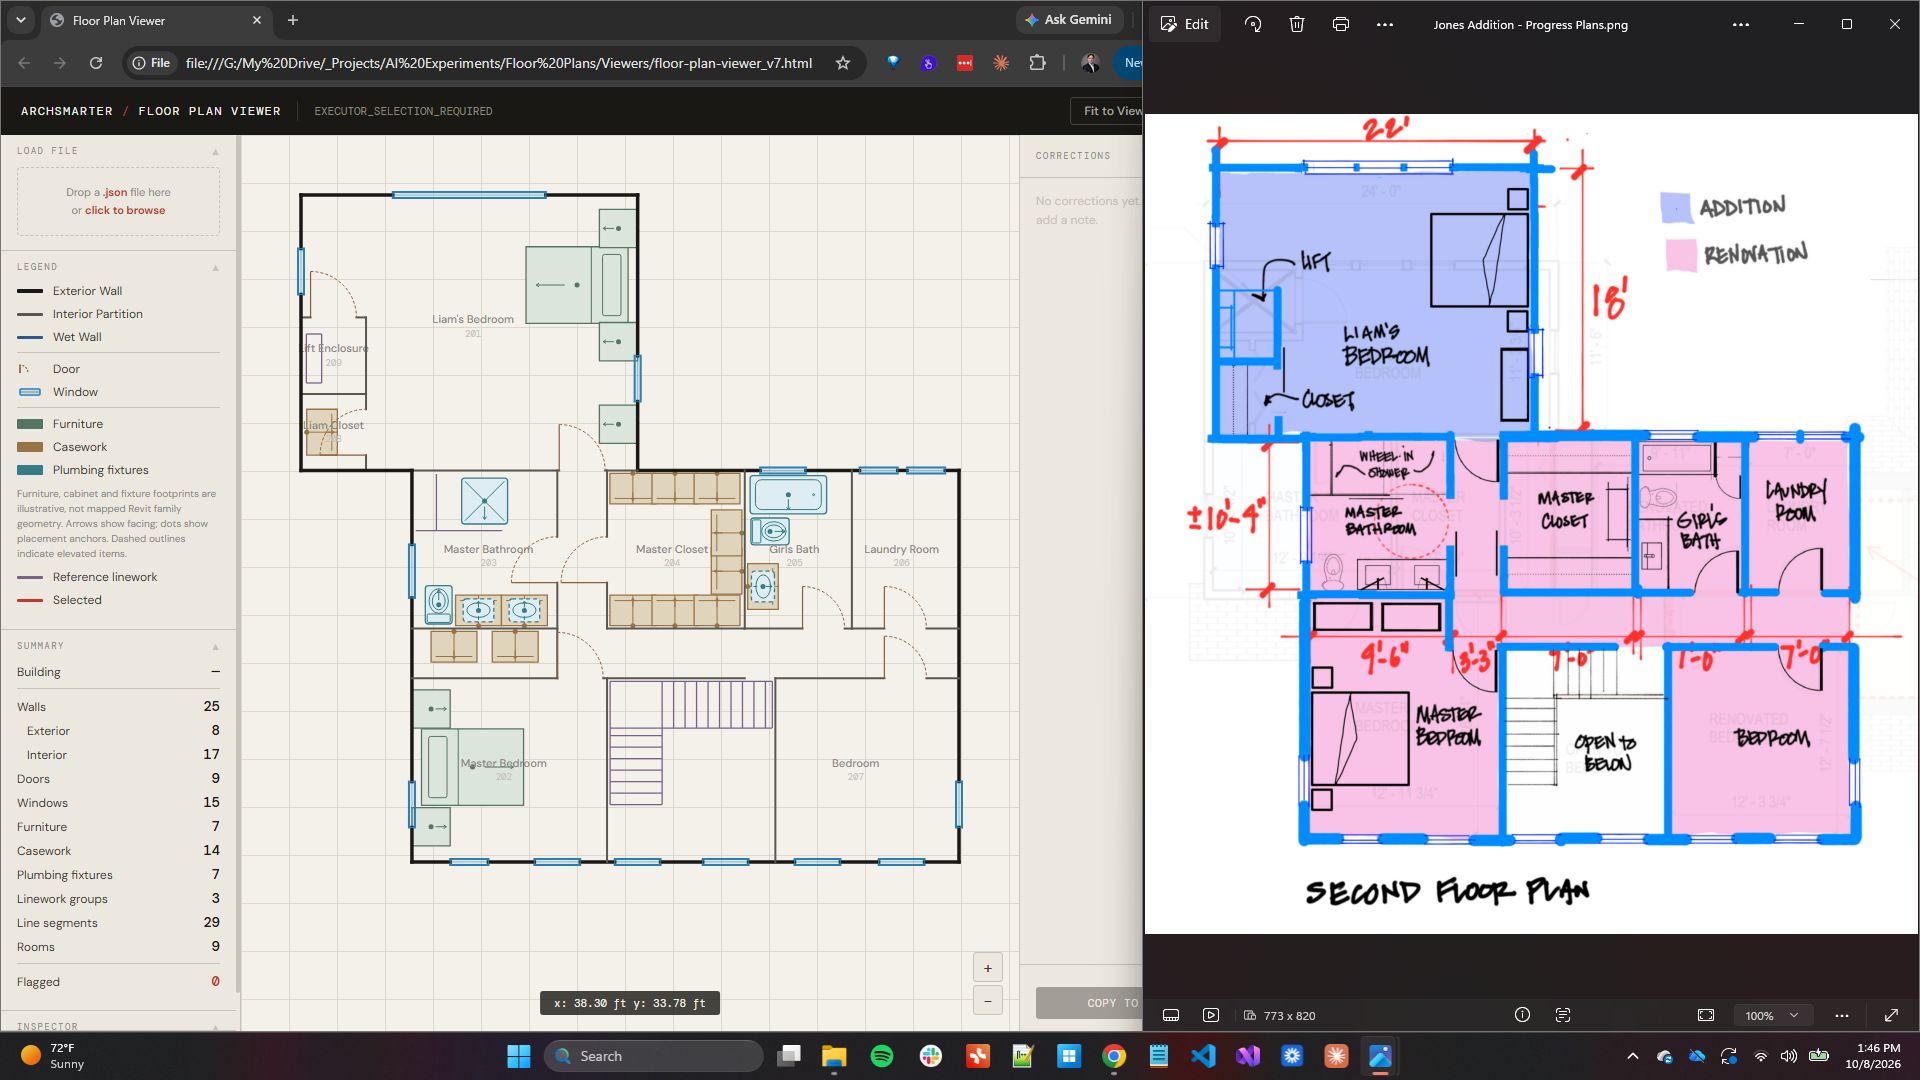
The residential example captured the major rooms and window locations reasonably well. It simplified some casework, misinterpreted the shower, and made the stairs look weird. Several door swings were also wrong.
I added notes asking it to flip two doors and remove another. It removed the unwanted door, but the flips didn’t resolve properly.
That exposed a limitation in my current data format: it doesn’t have the fields needed to communicate door flips. The correction loop can’t reliably carry those changes through yet.
This is worth separating from an AI interpretation problem. Sometimes the model misunderstands the drawing. Sometimes my tools don’t have a way to represent what I’m asking for. Both need attention, but they’re different fixes.
3. Generate the model using Revit types
After I review the data, I run a floor plan generator script in Revit 2026 using Launchpad.
The script lets me choose which elements to create and where to place them. For the residential example, I generated walls, doors, windows, rooms, and model lines, leaving out furniture and casework.
I also selected the target level, interior and exterior wall types, wall height, and base door and window types. The script uses those selections to translate the interpreted elements into Revit elements and, as needed, create additional opening types.
The residential test produced 27 walls and eight doors, along with windows and rooms. Compared with the sketch, the overall layout looked close. The dimensions I spot-checked were encouraging, although that wasn’t a full dimensional review.
There was still cleanup to do. Door swings remained unresolved, some openings had hosting issues, and the window types needed attention. The stairs came through as model lines rather than native Revit stairs.
Choosing suitable families matters, too. The generator needs a starting door or window type that behaves appropriately in the model. Getting an opening in roughly the right location isn’t the same as getting the right opening.
Next test: the dormitory
For the second example, I used a floor plan from a dormitory project I’d worked on a while back.
It was much more complex than the residential sketch, and the plan had no dimensions. That made it useful for testing whether the workflow could interpret a larger layout, but not for establishing dimensional accuracy.
The script generated 189 walls and 118 doors, along with windows, without reporting errors. I still needed to correct some door and window type selections, and the result missed details from the source image.
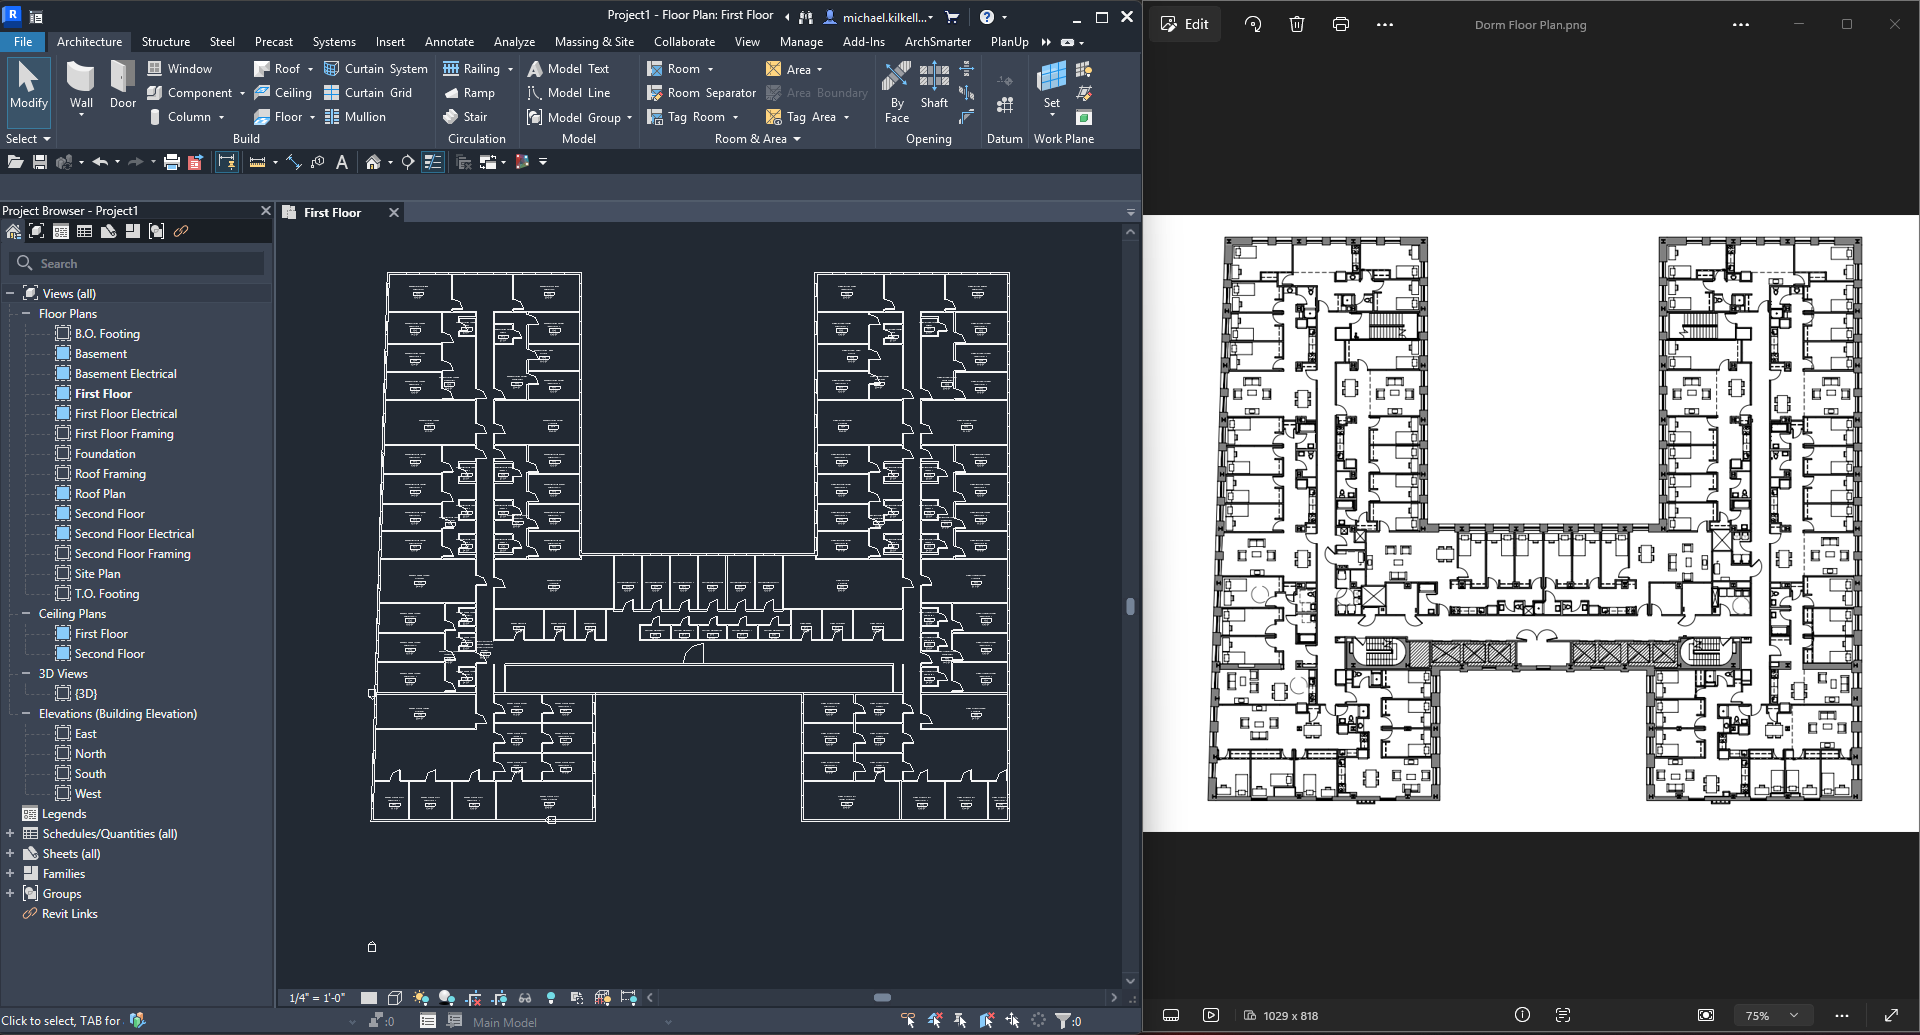
Successful execution doesn’t mean an accurate model. It means the script completed. Comparing the output with the original drawing is a separate task.
Even with those limitations, the result gave me a reasonable representation of much of the layout from a less-than-ideal image.
A starting model, not a finished one
In the demonstrations, I reached the residential starting model in roughly five minutes and the dormitory model in about five or six minutes. Those are approximate workflow times, not the time required to build the tools or finish the models.
I haven’t measured whether this is faster than manual modeling across a range of projects. Cleanup could eat into the initial savings, especially if the source is unclear or undimensioned.
What changed is my assessment of whether the approach is worth pursuing. The earlier attempts were inconsistent enough that I put them aside. These results here give me something much more useful to review and develop.
Sure, you still need to check dimensions, opening locations, family choices, and missing details. I’m not ready to trust it with a finished model. But I am ready to keep testing it to avoid drawing every wall from scratch.
Get the Thursday Top 5
My weekly email with five interesting and useful links on BIM, design, and technology, plus a few laughs along the way. I send it every Thursday. Join the over 8,000 AEC professionals who already get it.
