If you've ever wished you could create custom Revit tools without spending hours writing code, you're not alone. I recently hosted a live workshop where I demonstrated a new approach to automating tasks in Revit: vibe coding.
What is Vibe Coding?
Vibe coding is an AI-first approach to software development. Instead of manually typing hundreds of lines of code, you describe what you want in plain language and let AI generate the code. You then iterate quickly, testing and refining until you have exactly what you need.
Andrej Karpathy, a co-founder of OpenAI, coined the term 'vibe coding' in a post on X (formerly Twitter) on February 2, 2025. Since then, the concept has divided the programming community. Some see it as the future, while others view it with skepticism. Vibe coding enables Revit users to create tools and develop workflows that precisely match their project needs, even if they are not programmers.
The Three P's of Successful Vibe Coding
I've been using AI in my programming work since the early days of ChatGPT. However, it wasn't until last December that I put it into practice on a project from the beginning. I've realized since then that there are three essential parts to successful vibe coding, which I outlined in the workshop. The "3 Ps" framework consists of:
1. Platform
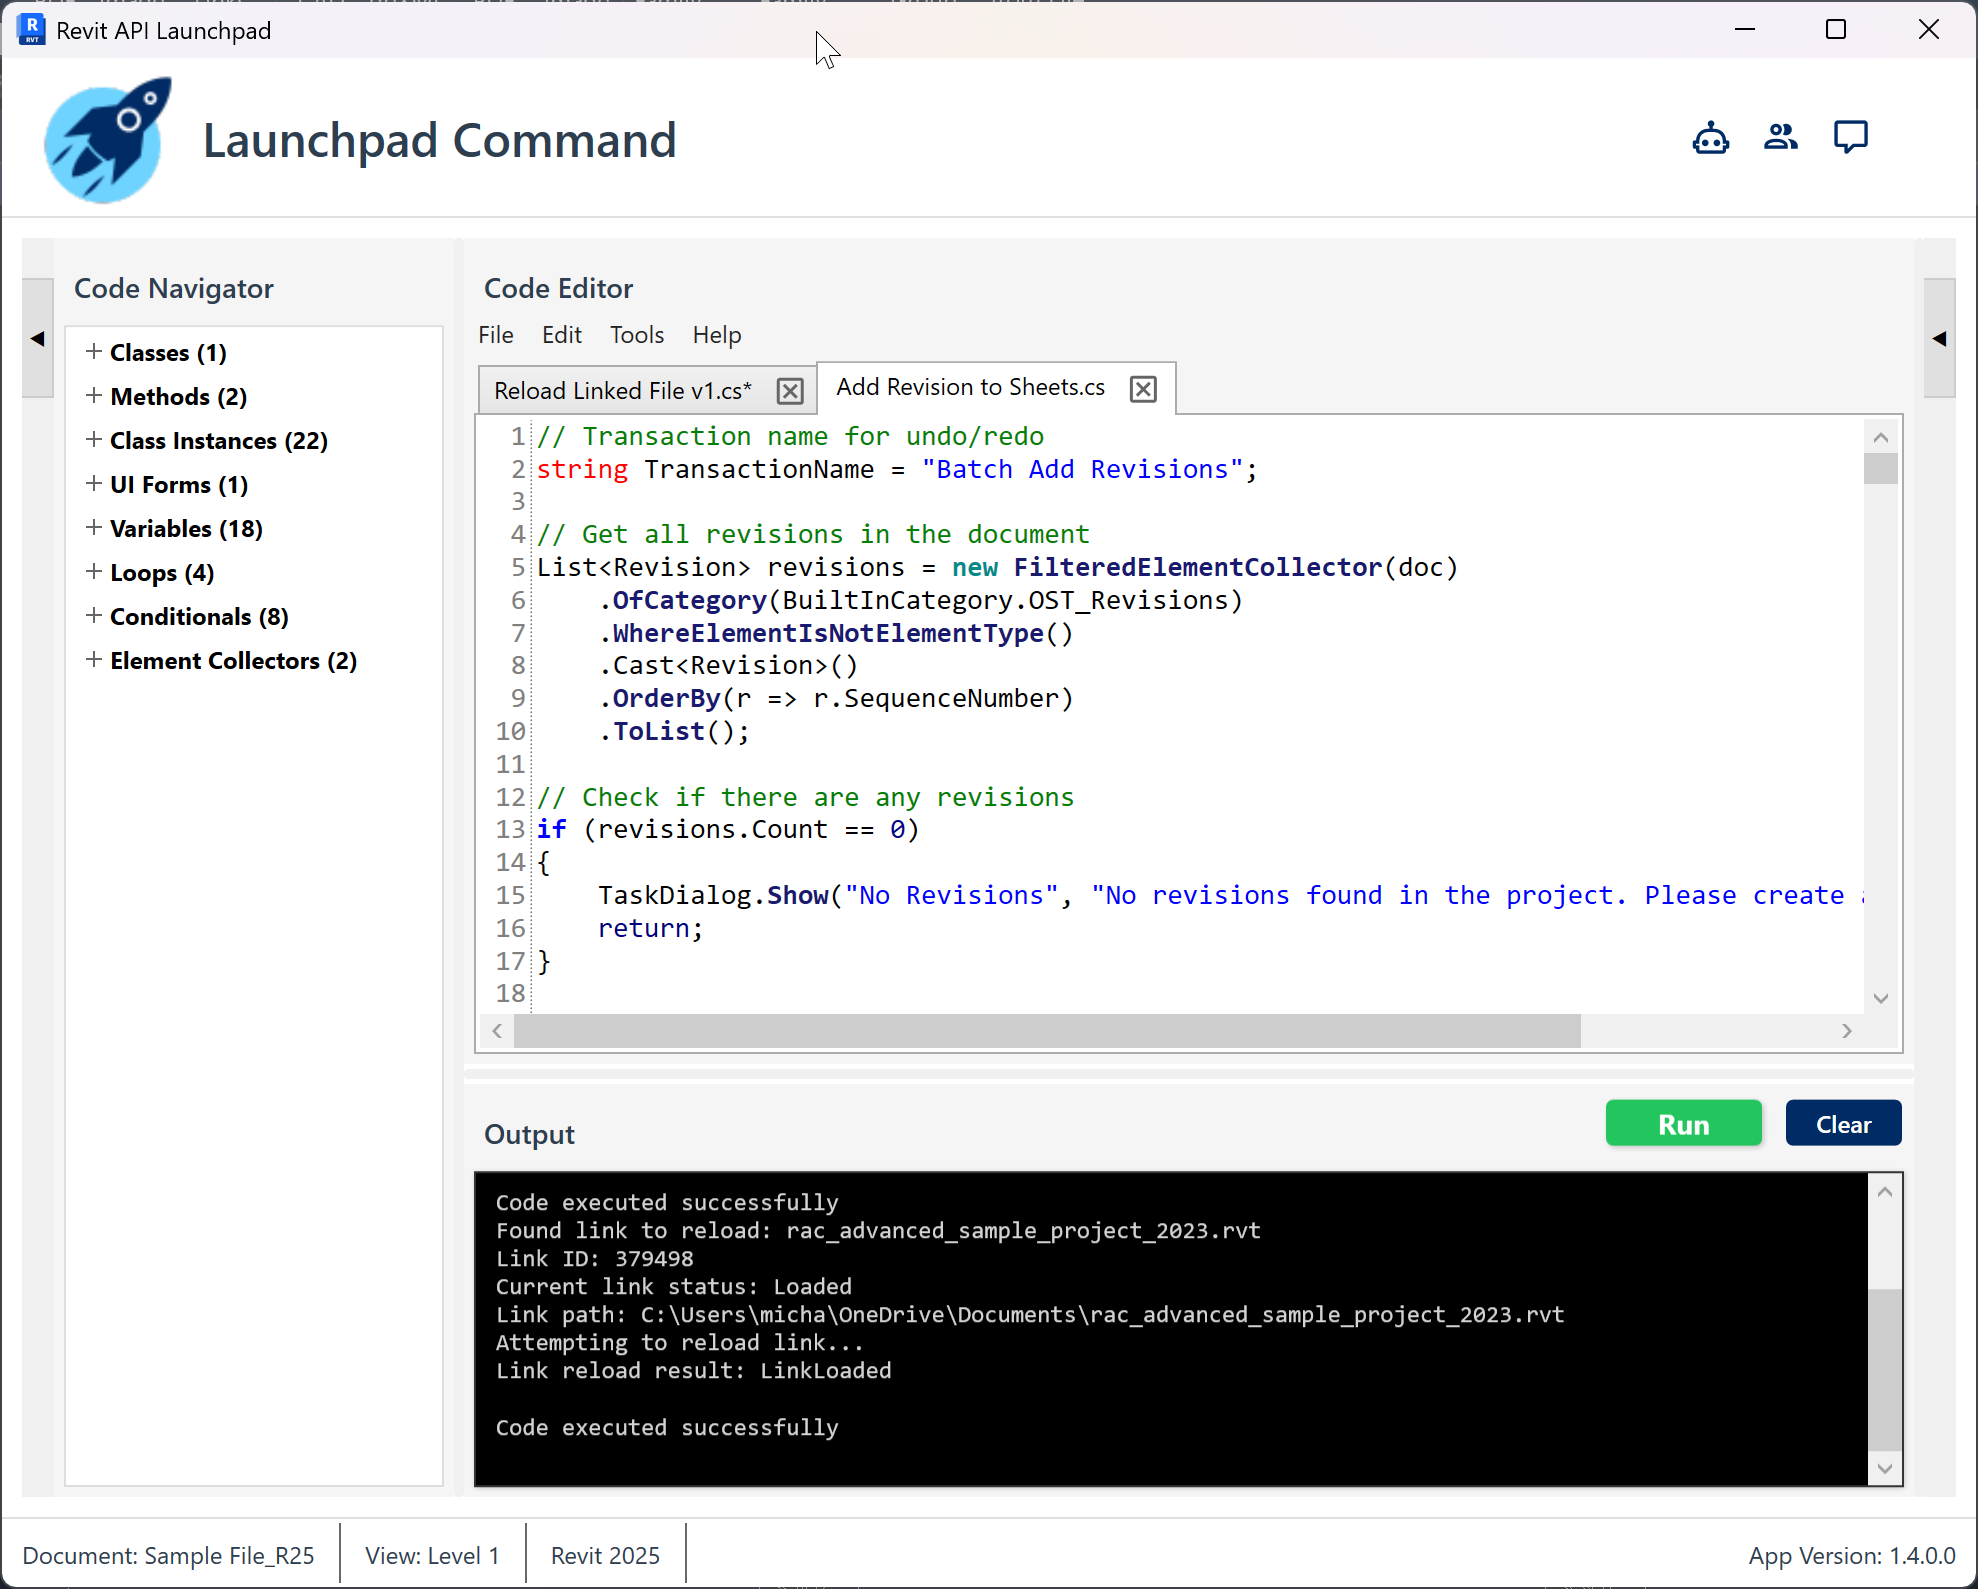
The platform is where you write and run your code. While you can use Dynamo Python nodes, PyRevit, or Visual Studio, I prefer Launchpad Command - a tool I created specifically for this purpose. Launchpad Command lets you write and test C# code directly inside Revit, eliminating the friction of traditional development.
2. Project
The project is your custom-tuned large language model (LLM). I use Claude with specific project knowledge, including coding standards, UI guidelines, and example scripts. This dramatically improves the quality and accuracy of generated code. You can do this in ChatGPT using a custom GPT.
3. Prompts
These are clear descriptions of what you want to build. The beauty of vibe coding is that you can start with rough ideas and refine them through conversation with the AI. No need for perfect specifications upfront. Iterate your vision as you test the results.
Real Tools, Real Time
The true test of any development approach is what you can actually build. In the 90 minutes of the workshop, we created four production-ready tools. The tools were:
1. Linked File Reloader
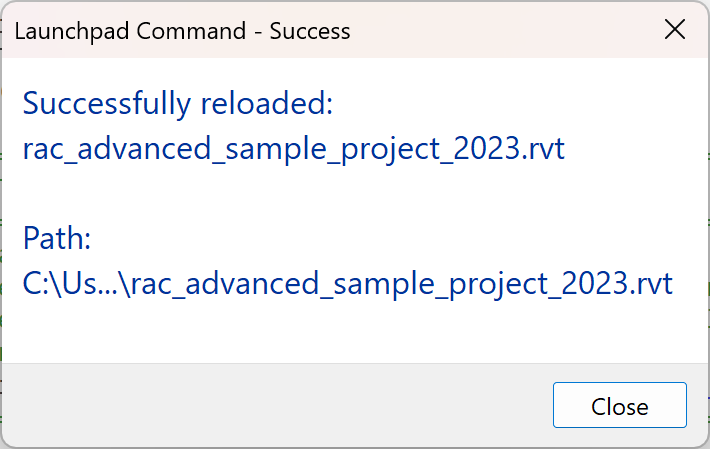
The Request: "I want to reload a specific linked file without going through Manage Links every time."
The Result: A tool that reloads specified RVT files with options for positioning, complete with user confirmation dialogs.
Time to Build: ~15 minutes
2. Model Cleanup Suite
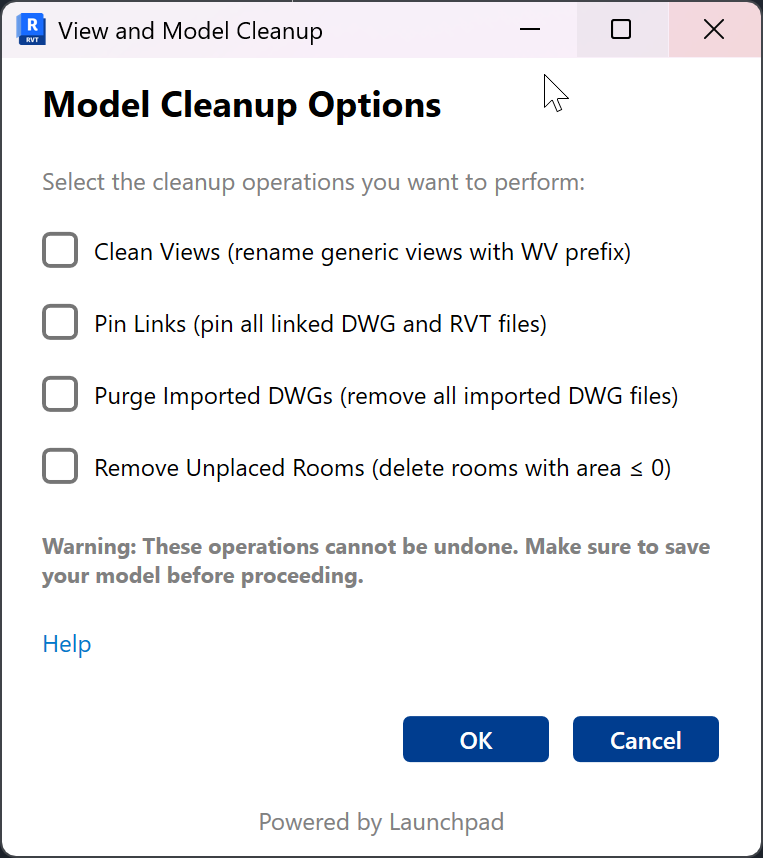
The Request: "Clean up views with generic names, pin all links, purge imported DWGs, and remove unplaced rooms."
The Result: A comprehensive Revit cleanup tool with checkboxes for each item type to clean.
Time to Build: ~20 minutes
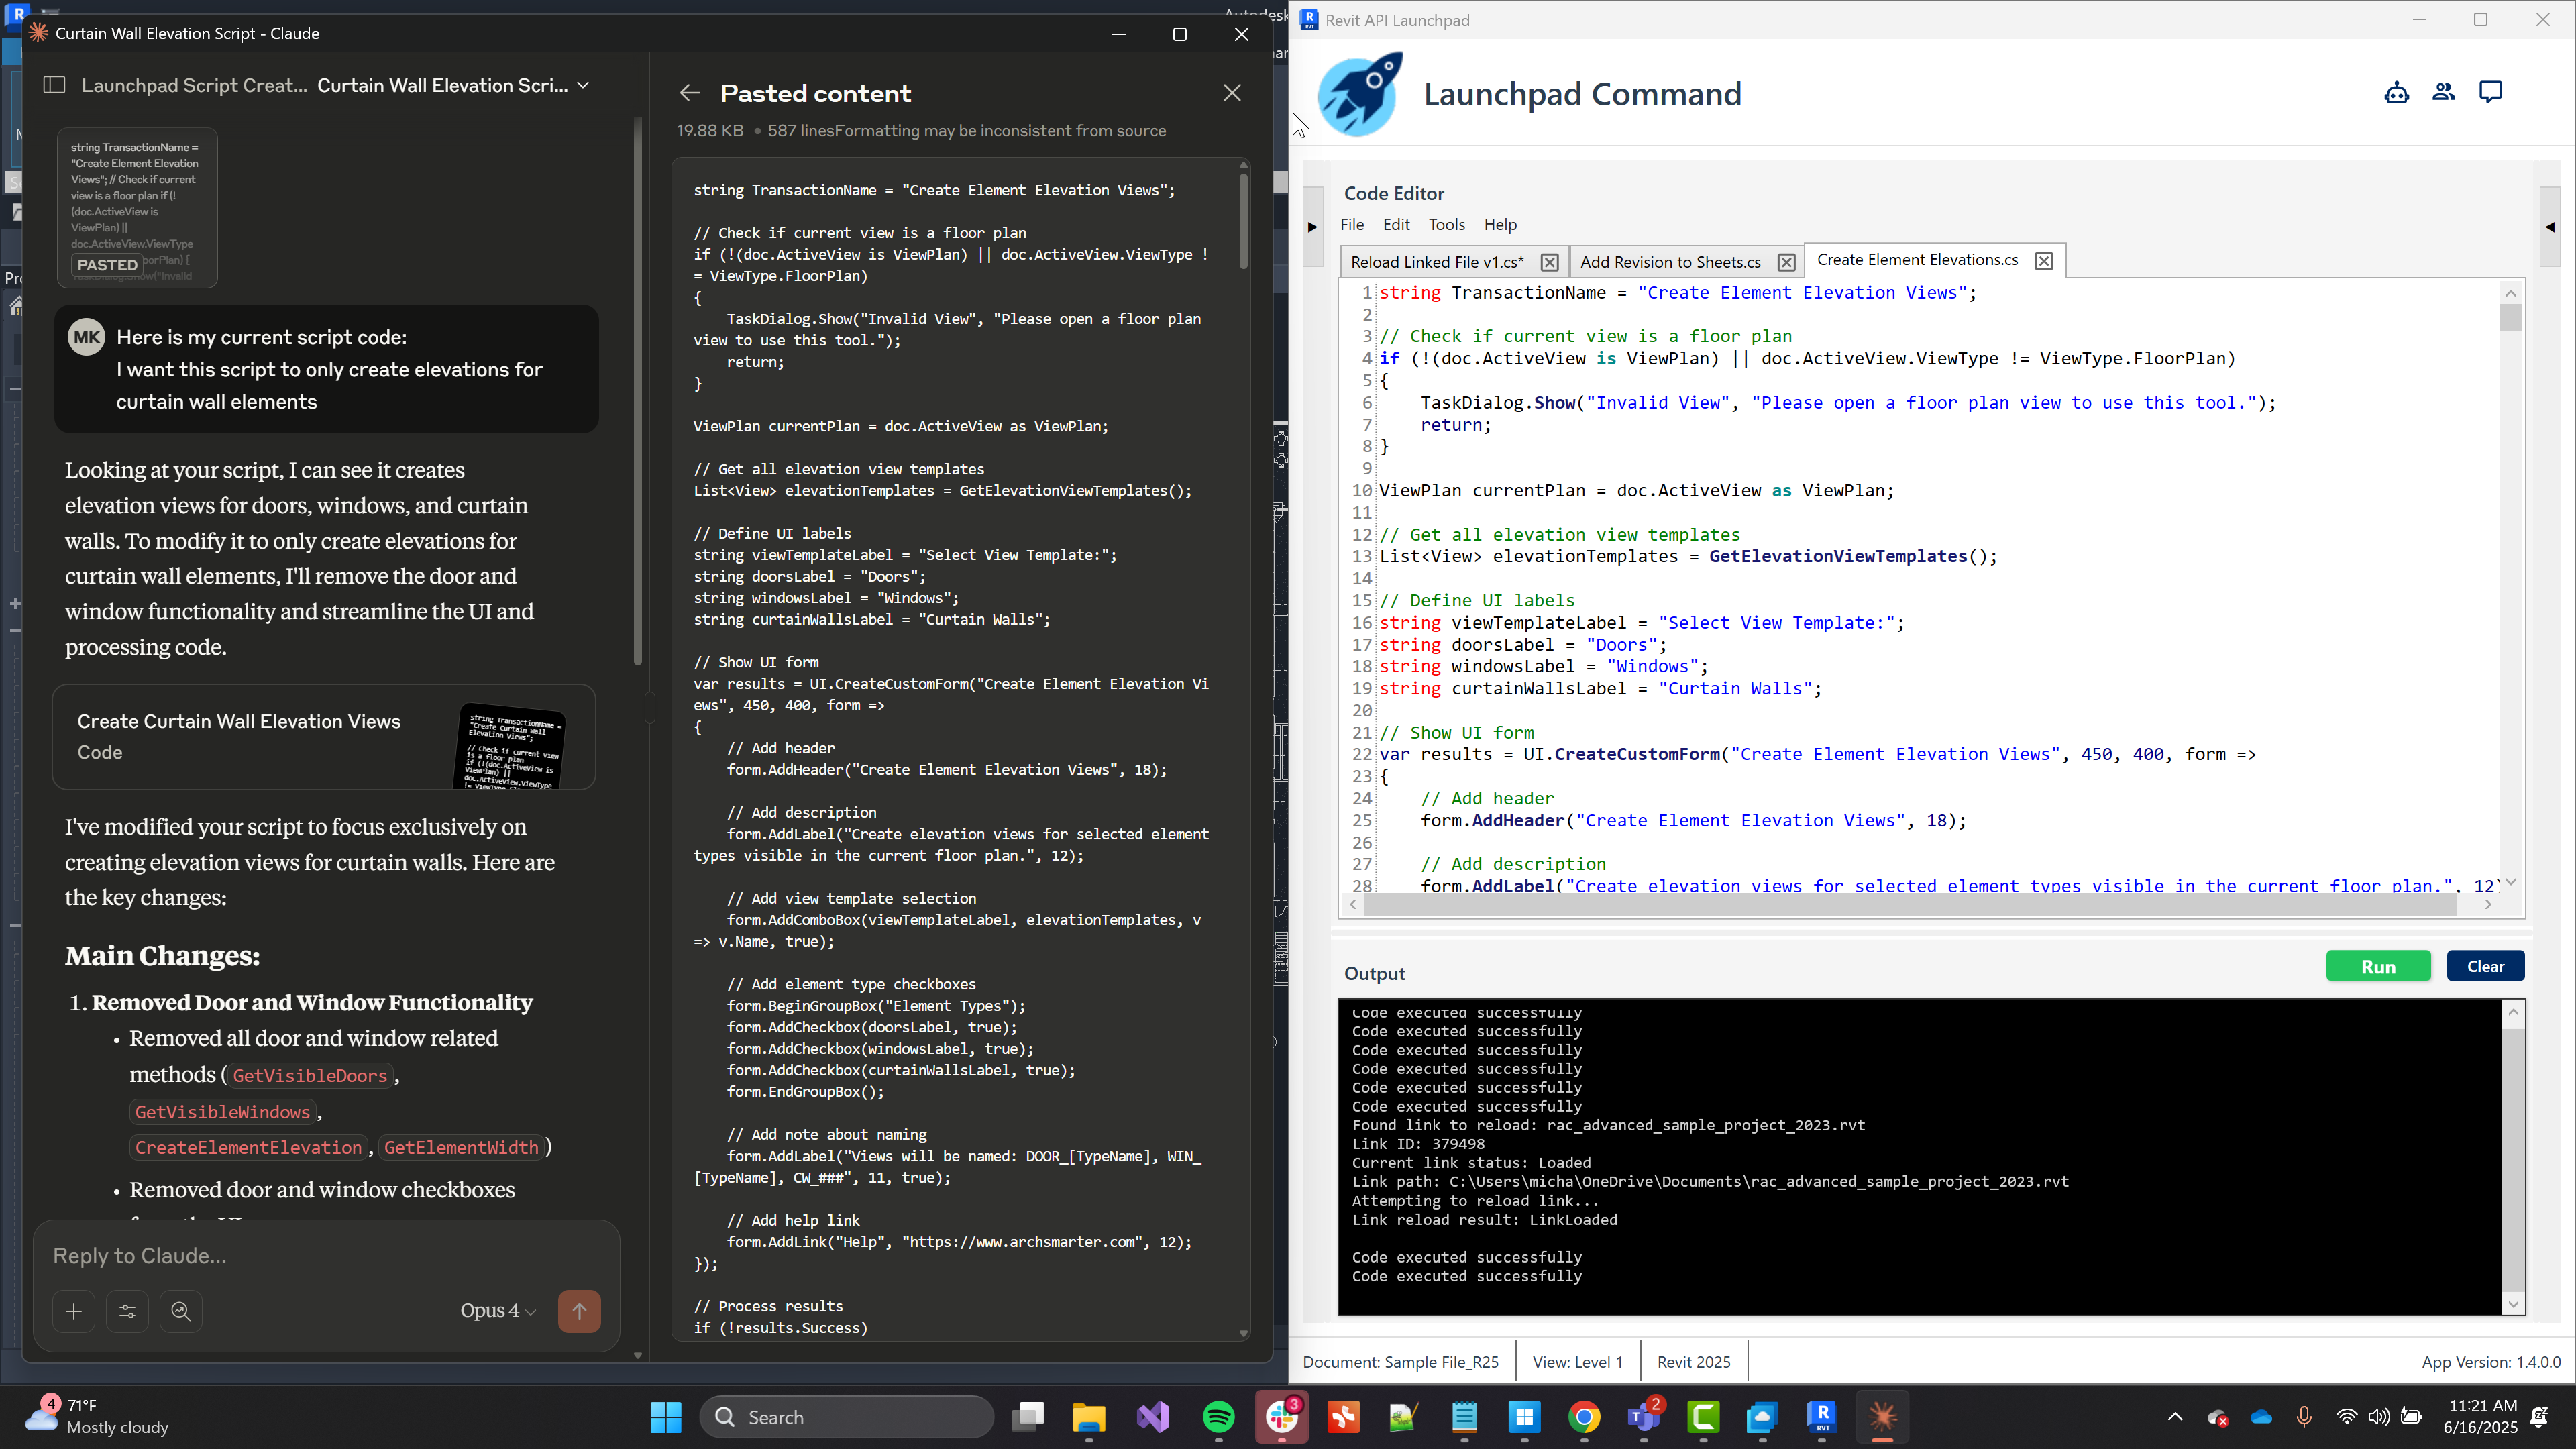
3. Element Elevation Creator
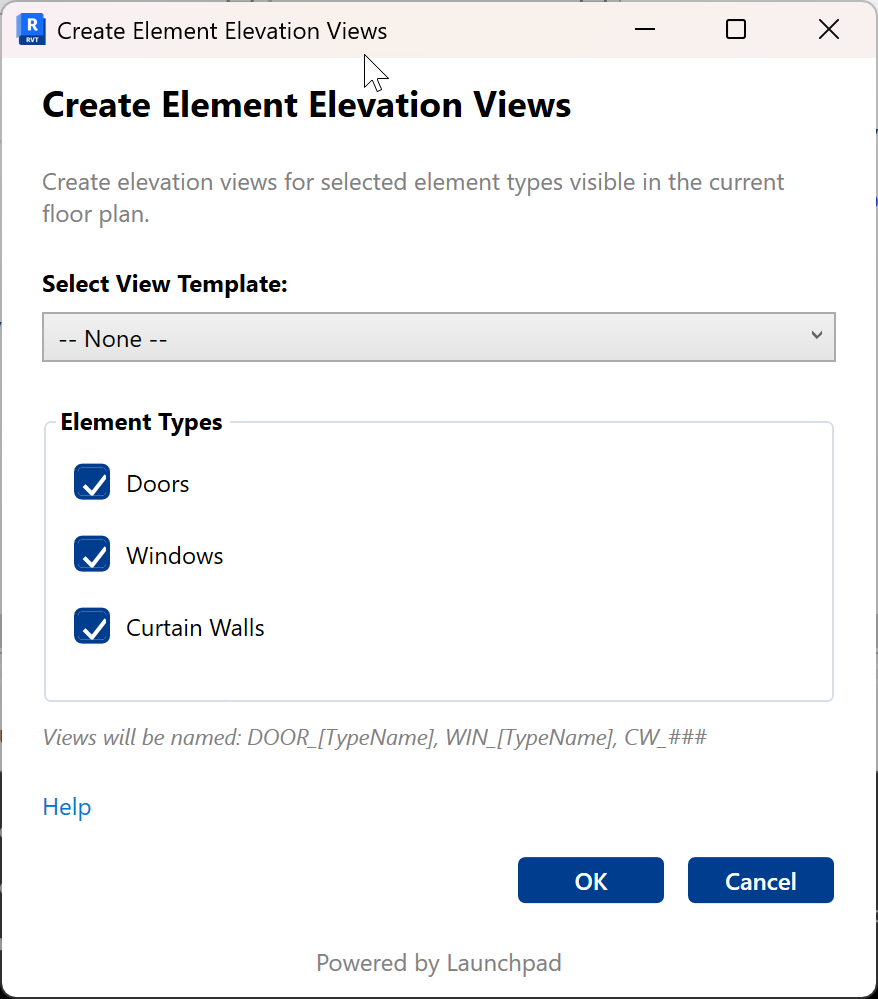
The Request: "Automatically create elevation views of doors, windows, and curtain walls."
The Result: A tool that generates properly cropped elevation views with customizable templates and naming conventions.
Time to Build: ~25 minutes (with some iteration needed on view positioning)
4. Batch Revision Manager
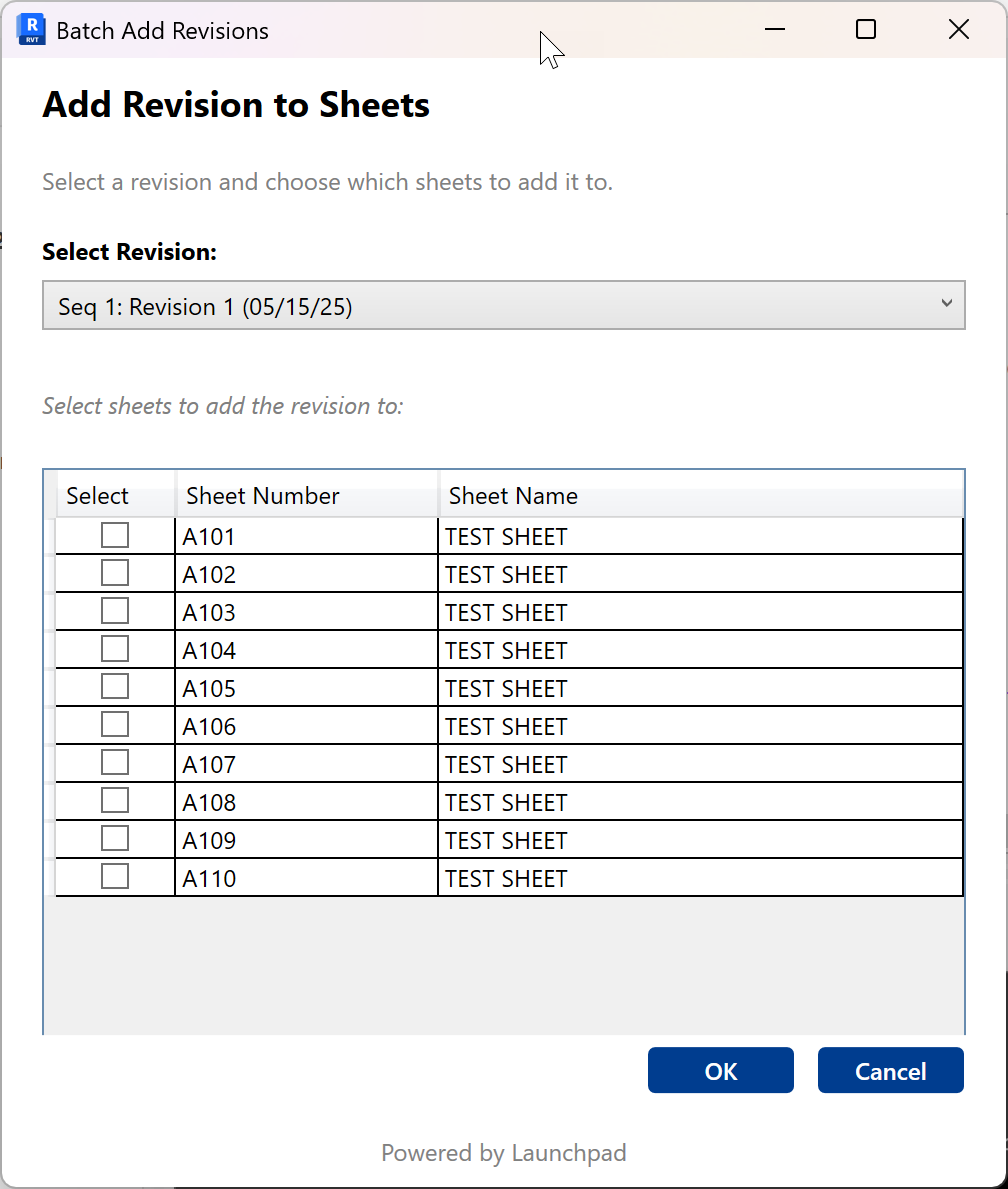
The Request: "Add revisions to multiple sheets at once."
The Result: An interactive tool with a data grid for sheet selection, a dropdown for revision choice, and select all/none buttons.
Time to Build: ~10 minutes - and it worked on the first try!
The Power of Iteration
One of the most potent aspects of vibe coding is rapid iteration. When the elevation tool initially created the views at 45-degree angles, I told the AI about the issue. It analyzed the vector math, identified the problem, and generated a fix in minutes.
This iterative approach means you don't need to get everything right the first time. You can start with a basic idea and refine it through testing and feedback.
What was really interesting was how the AI went beyond basic requirements. When creating the revision tool, it automatically added "Select All" and "Select None" buttons - features I hadn't requested but obviously improved usability. The cleanup tool added confirmation dialogs and progress bars without prompting.
This is where trained AI models (the second "p") shine. They don't just translate requirements; they apply best practices and common patterns from their training data.
Launchpad Command
If we were doing things the "traditional" way, the tools we created would typically require the following:
- Setting up Visual Studio
- Install the proper templates for Revit
- Writing 400-600 lines of code per tool
- Extensive testing and debugging cycles
- Hours or days of development time
With Launchpad Command and AI, we compressed this to minutes while working entirely within Revit. No external IDEs, no compilation waiting, no restarting Revit for each test. This lets you iterate much more quickly and test ideas in a fraction of the time it would take using a more traditional coding approach.
That's not to say there isn't a place for traditional approaches. There are limitations to the tools you can create with Launchpad. For example, tools that work in the background or tools that respond to actions the user takes in Revit are not possible with Launchpad. However, if you want to create tools that automate actions in Revit, Launchpad Command is a great option.
Sharing Tools - The Capsule System
One unique aspect of Launchpad is the "capsule" system - packages of tools that automatically create ribbon panels in Revit. During the workshop, I showed how to:
- Save generated scripts
- Create a capsule configuration
- Add buttons with tooltips and icons
- Share the capsule with team members
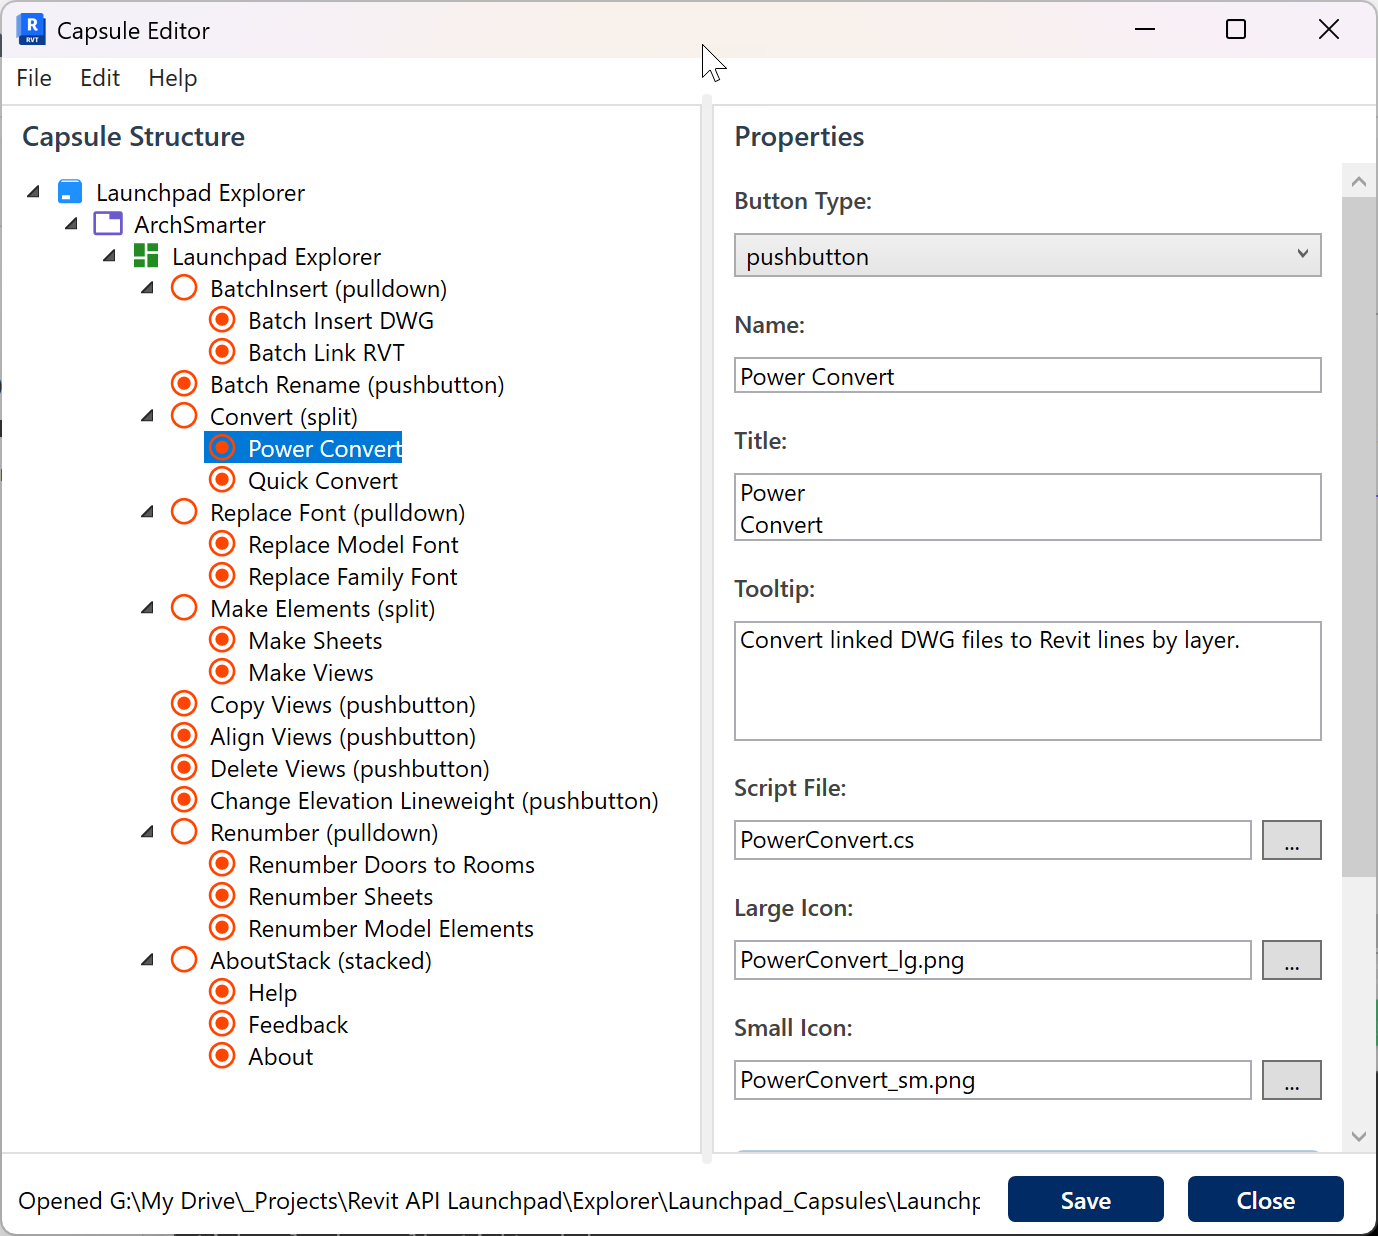
Anyone with the free Launchpad Explorer can run these capsules, making deployment across teams straightforward.
Looking Forward
As I mentioned in the workshop, I've been programming Revit since 2012, starting with macros and moving through Dynamo to C# add-ins. The shift to AI-assisted development over the past six months has been the biggest productivity boost I've experienced.
We're at an inflection point. The combination of AI capabilities and purpose-built tools like Launchpad Command means custom automation is no longer the exclusive domain of programmers. Any motivated AEC professional can now create the tools they need.
Key Takeaways
- Speed Matters: What once took hours now takes minutes
- Iteration Over Perfection: Start rough, refine quickly
- AI as Partner: Let AI handle the syntax while you focus on solving problems
- Accessibility: You don't need to be a programmer to create professional tools
- Community Power: Share your creations easily with capsules
Try It Yourself
If you're interested in exploring vibe coding:
- Watch the full 90-minute workshop where we created the tools mentioned above
- Download Launchpad Explorer (free) to run community tools
- Try the Custom GPT I've trained for Launchpad
- Consider Launchpad Command for full development capabilities
The future of AEC automation isn't about replacing human creativity - it's about amplifying it. When we can go from idea to working tool in minutes, we can solve more problems, iterate faster, and focus on what really matters: designing better buildings.
Get the Thursday Top 5
My weekly email with five interesting and useful links on BIM, design, and technology, plus a few laughs along the way. I send it every Thursday. Join the over 8,000 AEC professionals who already get it.